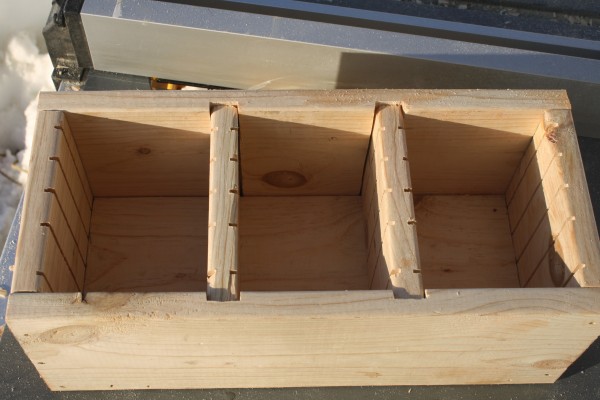
How to make a seed organizer for under $10.
Winter has been long and hard this year in Alaska. I’ve been desperately waiting for the snow to melt to begin gardening , and decided to finally organize my seeds while I wait for warmer weather. I built this box in an afternoon and painted it the following afternoon. I hope you enjoy!
Materials:
- 1 – 1x6x8′
- Shellac (optional)
- thin cardboard (cereal boxes work well)
Tools:
- Circular saw
- Screwdriver
- Square and tape measure
- Table saw (optional)
Cuts:
You’ll be cutting the 1×6 lumber into the following pieces. However, you may want to wait to cut them until you have cut the grooves in the various pieces (explained further in this tutorial). I have marked the cuts (and the steps) below with an asterisks that you may want to accomplish before you actually make the cuts below.
- 1 – 12″
- 2- 15″*
- 2 – 5 1/2″*
- 2 – 6″x4 1/2″*
Step 1: Cut your bottom and long side pieces.
Cut one piece of your 1×6 to be 12 inches long. Then cut two pieces that are 15 inches long. The trick is to cut them as straight as possible, so that the box will go together without any gaps. You may want to wait to cut the 15″ pieces until you’ve completed step 2.
Step 2: Notch your 15″ pieces.*
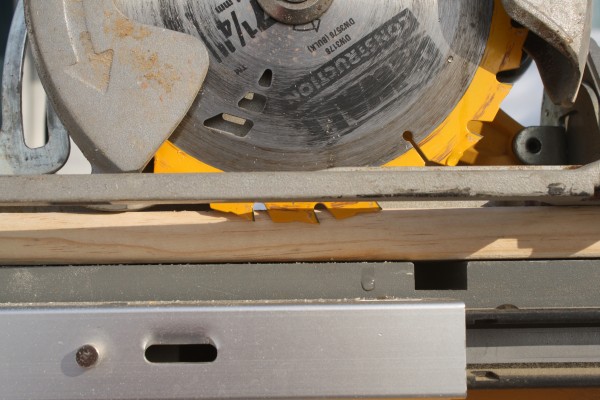
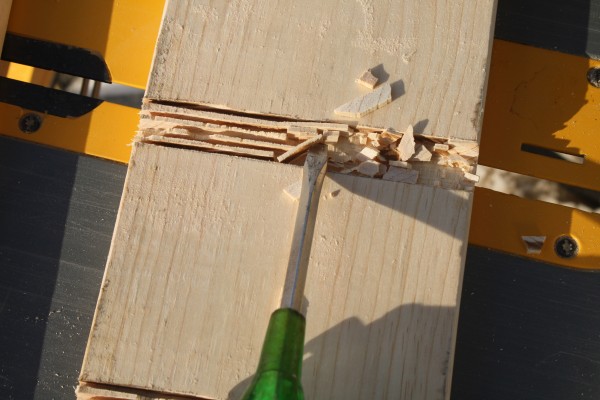
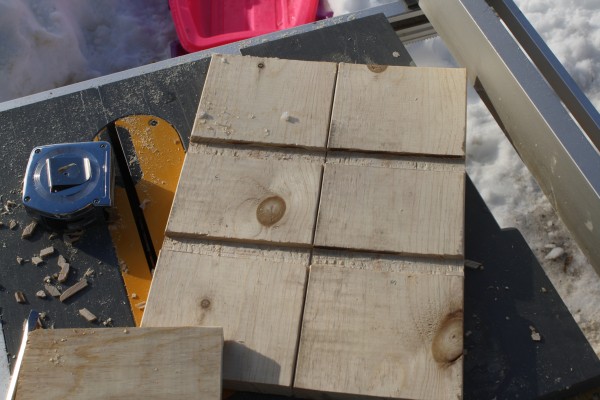
Determine which side of your 15″ pieces will be on the inside of the box. Using a square and a pencil, mark the boards at the 4 3/4, 5 1/2, 9 1/2 and 10 1/4 inch marks respectively. Set the blade depth of your saw to approximately 3/8″. You can do this by setting your circular saw on the board and adjusting the saw so that the teeth are half the thickness of the board. Then carefully cut the board along the lines. Once you have the lines cut, take three or four passes with the saw between the lines so that you have a series of closely-cut grooves. Take a flathead screwdriver or a chisel and break off the wood within the grooves and smooth it out.
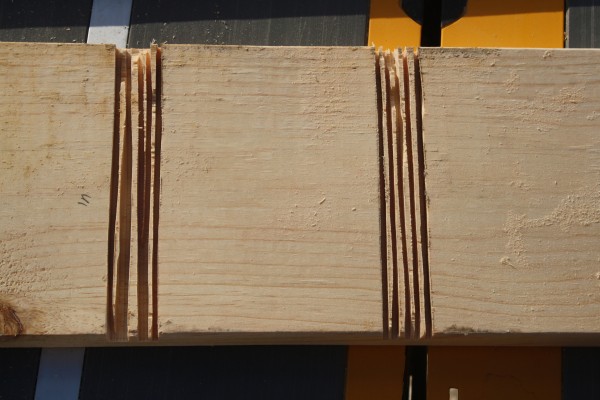
Once you've cut the outer lines, make multiple cuts between the two lines to create little flakes of wood like this.
Step 3: Notch your short side pieces. *
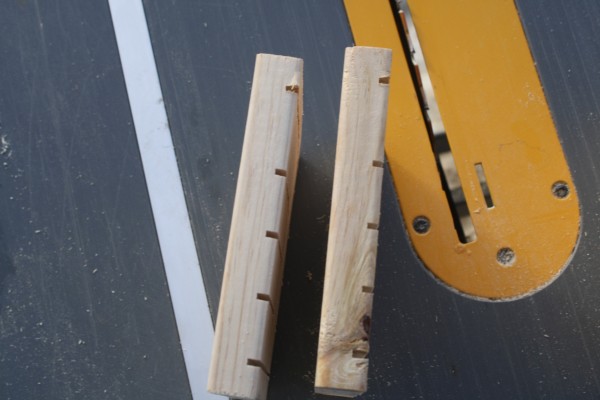
On the end of your box you will have the two pieces of 1×6 that are 5.5″ long. In order to create grooves to put your cardboard dividers in, you’ll need to adjust the blade depth to 1/4″. I used a table saw for this step, but a circular saw would work as long as the cuts are made very straight.
Decide which side will be on the inside of the box. Mark and cut a line every inch in the boards, so that you are left with boards that have 1/4″ grooves every inch on one side. Start on the same side (from the left or the right) so that your cuts line up perfectly with each other
Step 4: Notch your inserts*
Your seed box will have three different slots to puts your seeds and dividers. You’ll need 2 boards that are 6 inches long and 4 1/2 inches wide to slide into the box to create these slots. There will be 1/4 grooves on both sides of these pieces. Once again, set your blade depth to 1/4″ and cut grooves every 1″, but start 1 3/8″ into the board. Remember, these pieces will be inset into the the long sides of the box by 3/8″, so you need to add 3/8″ when you cut your first groove. Start on the same end as you did in the previous step so that the grooves line up exact.
Once the grooves are created, I then cut down the board to 4 1/2 inches wide.
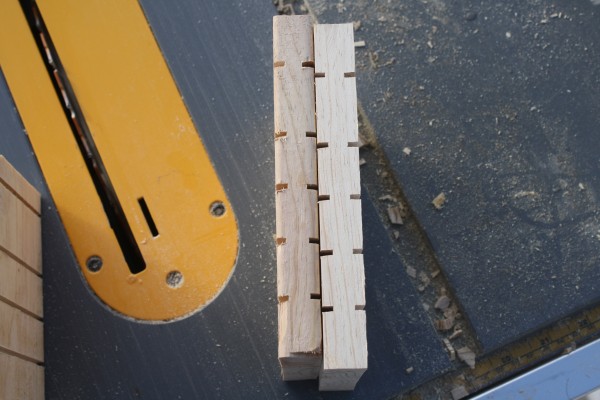
The cross pieces are also cut 1/4 deep every inch, but on both sides. Remember your fist cut should actually be 1 3/8 inch in from the edge.
Step 5: Put your box together
The next step is simply to put your box together. Put the four walls together first, then tap the bottom piece in and fasten it. You can use nails or screws, but you’ll want to pre-drill your holes if you use screws. I used finish nails in a pneumatic nail gun.
Step 6: Create cardboard inserts
Cut your cardboard inserts. They should be approx. 4 1/2 inches wide and 4 1/2 to 6″ tall. You may need to trim them to fit properly. You’re done!
OPTIONAL STEPS:
Step 7: Paint and decorate!
Slap a couple of coats of shellac on the inside and outside of the box.I had some old (expensive) sign paint around and decided to paint the front. I’m no artist, so I’ll show you how I cheat:
I use a program (Illustrator in my case) to create a design. I print it off and tape it to the box. I use a pushpin to create tiny dimples along the border of the letters and drawings. Removing the paper, I now have a template for painting my design!
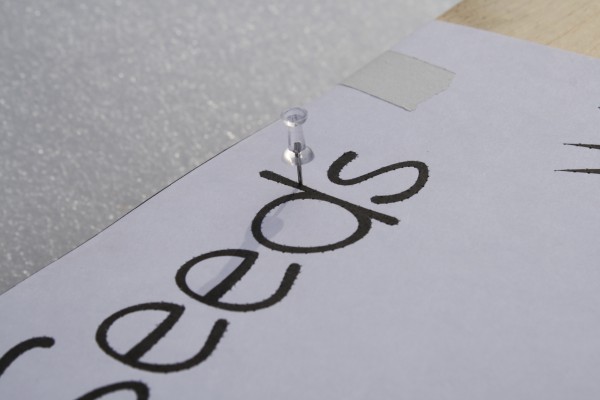
To make a template to paint, I tape on my design and use a push pin to outline the edges of the letters and drawings.


